Denn mein Kind wählt sein Outfit selbst.
Und ja, das funktioniert! Und es lohnt sich! Deshalb möchte ich euch heute ein wenig darüber erzählen, wie der Kleiderschrank aufgebaut ist, wie unser Morgen inklusive dem Anziehen aussieht, und welche Vorbereitungen notwendig sind. Denn Vorbereitung ist alles.

Ein kleinkindfreundlicher Kleiderschrank
Ich wurde ja immer belächelt, wenn ich erzählte, dass mein Kind sich morgens beim Anziehen einen Body aussuchen durfte, und abends einen Strampler. Damals war das Kind vielleicht 5-6 Monate alt. Und ja, vielleicht kann ein Baby mit 5 Monaten noch keine "echte" Entscheidung treffen. Vielleicht kann es noch gar nicht entscheiden, welcher Body schöner aussieht oder auf welchen Body es gerade mehr Lust hat. Vielleicht ist die Wahl vollkommen willkürlich. Aber es ist eine Wahl! Es ist Kommunikation und Miteinbeziehung und das Recht mitzuentscheiden über Angelegenheiten, die den eigenen Körper betreffen. Auf welcher Ebene auch immer. Und ich finde das so so wichtig! Babys wie Menschen zu behandeln, meine ich. Nicht wie Puppen. Oder dressierte Äffchen. Und entschuldigt, wenn das jetzt zu dramatisch klingt, aber ich habe das an meinem eigenen Kind erlebt, und ich finde es einfach respektlos. Und ich bin mir absolut sicher, dass schon kleine Babys merken, ob man sie mit Respekt behandelt, oder wie ein kleines unfähiges Dummerchen, das doch noch gar nichts versteht und nichts kann, außer auf Kommando lächeln bitteschön.Aber zurück zum Thema.
Als Ellinor 11 Monate alt war, zogen wir aus unserem Schlafzimmer aus und verwandelten es in ein Kinderzimmer. Dass das Kind einen eigenen Kleiderschrank bekommen sollte, war von Anfang an klar, und ich finde, dass etwas ganz Tolles aus unseren Überlegungen entstanden ist. Wir kauften ein Eket-Regal vom Möbelschweden und hängten es so an die Wand, dass das Kind alle vier Fächer gut erreichen kann. Zwischen der Wand und dem Regal montierten wir eine Kleiderstange, ebenfalls gut erreichbar.
In die Fächer legten wir Skubb-Boxen (ebenfalls vom Möbelschweden) und ich bastelte ein paar kleine Bildchen, die dem Kind zeigen, wo die Pullover hineinkommen, wo die Socken, usw. (Die Boxen unten rechts sind ganz neu und haben deshalb noch keine Beschriftung. Dort sind Schlafanzugoberteile und -hosen in separaten Boxen, wo vorher Strampler in einer waren).
Vorbereitung ist alles
Wie oft ich diesen Satz schon zum Liebsten gesagt habe! Es ist quasi mein Lebensmotto für mein Leben mit Kleinkind. Vorbereitung ist alles. Auch für mehr Selbstbestimmung und Selbstständigkeit beim Anziehen.Vorbereitung ist alles.
Okay. Das Ziel ist jetzt also, das Kind sich selbst ein Outfit aussuchen zu lassen, ohne sich einzumischen, die Hälfte wieder umzutauschen und am Ende doch das ganze Outfit selbst ausgesucht zu haben. Nur wie?
Natürlich kann man von einem Kleinkind nicht erwarten, vor dem Anziehen aus dem Fenster zu schauen, das Wetter korrekt einzuschätzen, und sich dementsprechend ein Outfit zusammenzustellen. Man kann auch nicht erwarten, dass das Kind zwischen unzähligen Röcken, Kleidern, Boleros, Hüten, Capes, Stulpen und Westen weiß, was man zusammen anziehen kann und was nicht, und sich am besten noch farblich abgestimmte Kleidung aussucht. Damit so ein Kleiderschrank für ein Kleinkind funktioniert, muss er so einfach, übersichtlich, ordentlich und an das aktuelle Wetter angepasst sein wie nur möglich. Hier sind ein paar praktische Tipps, wie wir Ellinors Kleiderschrank vorbereiten um ihr die größtmögliche Selbstständigkeit und Entscheidungsfreiheit zu geben.
1. Vereinfachen und Kategorisieren
In Ellinors Kleiderschrank gibt es jeweils eine Box für Socken, Strumpfhosen, Schlafanzughosen, Schlafanzugoberteile, Pullover/Strickjacken und kurze Hosen/lange Hosen/Romper, sowie die Kleiderstange für Bodys. Socken und Strumpfhosen sowie die Schlafanzüge befinden sich dabei in dem jeweils selben Regalfach. Jetzt im "Winter" (ähem) bestand ihr Tagesoutfit im Grunde aus einem Kleidungsstück pro Box/Stange:
1 langärmliger Body,
1 Pullover oder Strickjacke,
1 Strumpfhose,
1 Paar Socken,
1 Hose.
Und ja, das heißt auch, dass einige Optionen, wie jetzt im Winter zum Beispiel Kleider, gar nicht erst zur Auswahl stehen. Manchmal hole ich eins zu besonderen Anlässen heraus, oder sie verlangt selbst danach. Aber durch das Weglassen vermeiden wir eine komplizierte Extraoption, die auch noch an Bedingungen geknüpft ist ("Wenn Kleid, dann keine Hose." z.B.). Haltet es so einfach wie möglich!
2. Optionen begrenzen
Zur Zeit befinden sich in den Boxen jeweils nur 3-6 Kleidungsstücke. Das ist das, was bei uns im Moment gut funktioniert. Für andere Kinder oder ein anderes Alter funktioniert es vielleicht am Besten mit nur 2 Optionen, oder mit 10. Probiert das aus! Bei zu wenigen Optionen wird das Kind vermutlich andere Sachen verlangen, einfach alles ablehnen oder an den Kleiderschrank gehen, in dem ihr die Sachen aufbewahrt, die gerade nicht zur Auswahl stehen. Bei zu vielen Optionen entsteht vielleicht ein riesiges Chaos, weil alles ausgeräumt wird, oder das Kind kann sich nicht entscheiden und wählt in jeder Sekunde eine andere Option. Oder muss jedes einzelne Teil erst anprobieren und das Anziehen zieht sich mehr in die Länge, als euch lieb ist.
3. Vorsortieren
Wenn ihr Wert darauf legt, dass eurer Kind nicht aussieht, "als hätte es sich selbst angezogen" (Haha!), sortiert vor. Ich achte beim Auffüllen der Boxen immer darauf, dass möglichst alle Pullover mit allen Hosen zusammenpassen. Das ist nicht besonders kompliziert, weil fast alle ihrer Kleidungsstücke eher dezent und gehalten sind und auch ohne aktives Vorsortieren farblich ganz gut zusammenpassen.
Wir sortieren auch immer für das aktuelle Wetter vor. Also wärmere Hosen und Pullover, wenn es kälter ist, dünnere Pullover und Hosen und kurzärmlige Bodys, wenn es wärmer ist. Ich mache das übrigens auch mit ihren Jacken, Mützen, Schals und Schuhen im Flur. Man vermeidet so viel unnötigen Stress, wenn die geliebten Gummistiefel gar nicht erst herumstehen, wenn es draußen -10° C sind, und das Kind kann echte Entscheidungen treffen, nicht Entscheidungen, die dann für schlecht oder falsch erklärt und übergangen werden. Und das ist ja das Ziel, nicht wahr?
Wenn es dann doch passiert, dass die besagten Gummistiefel draußen stehen, obwohl es viel viel zu kalt ist, dann ist das in erster Linie mein Problem, nicht ihres. Ich habe sie draußen stehen lassen und sie hat sie gewählt. Wenn also kein wirklich guter Grund dagegen spricht und das Kind meinen Alternativvorschlag (warme Stiefel) ablehnt, dann lasse ich sie die Gummistiefel anziehen. Und weil ich immer noch die Verantwortung für das Wohlergehen meines Kindes habe, ziehen wir vielleicht 4 Paar Socken in den Gummistiefeln an. Oder ich stecke die Winterstiefel ein, wenn wir rausgehen. Aber nur weil ich es besser weiß, beraube ich sie nicht ihrer Entscheidungsfreiheit und einer wertvollen Erfahrung.

Freie Outfitwahl in der Praxis
Der Schrank ist vorbereitet - Jetzt wird es spannend! Als allererstes haben wir dem Kind den Schrank gezeigt, erklärt, was die Schildchen bedeuten, was wo drin ist, wozu das ganze gut sein soll, und das Kind alles untersuchen, ausräumen und ausprobieren lassen. Offiziellen Zugang zu den Klamotten zu haben kam natürlich sofort gut an! Regelmäßiges Ein- und Ausräumen und Untersuchen gehört besonders am Anfang natürlich dazu, aber mir fiel auf, dass sie seitdem nicht mehr die Kommode oder ihren Kleiderschrank im großen Stil ausräumte und dabei so ein riesen Chaos hinterließ, das sie nicht in der Lage war, allein wieder zu beseitigen. Jetzt hat sie nicht nur einen guten Überblick über ihre Kleidung, sie kann auch alles ganz allein wieder ein- und wegräumen.Zeit einplanen
Natürlich geht es so so viel schneller, wenn man einfach schnell etwas zum Anziehen auswählt, das Kind reinsteckt und in den Tag starten kann. Und sicherlich geht es manchmal auch gar nicht anders. Aber leider gehen dabei so viele Dinge verloren, die das Projekt "kleinkindfreundlicher Kleiderschrank" so wertvoll für mich/uns machen. Selbstständigkeit zum Beispiel, oder die Möglichkeit selbst zu Entscheiden, Konzentration, und zu üben, sich selbst anzuziehen. Und die vielen kleinen Gespräche am Morgen.
Wir haben das Glück, dass wir normalerweise nirgendwo zu eine bestimmten Uhrzeit sein müssen. Wenn das Kind also 10 Minuten lang jedes Paar Socken in ihrem Schrank anprobieren möchte - kein Problem! Und während sie ganz konzentriert übt, sich die verschiedenen Socken selbst anzuziehen, mache ich schon mal Kaffee oder andere Dinge auf meiner meilenlangen To-Do-Liste und komme zurück, wenn das Kind fertig ist, um mit ihr das restliche Outfit zu wählen. Ich genieße es sehr, dass wir nicht hetzen müssen. So wird das Anziehen nie zu einem lästigen Punkt auf der Tagesordnung, der eben erledigt werden muss.
Wir haben das Glück, dass wir normalerweise nirgendwo zu eine bestimmten Uhrzeit sein müssen. Wenn das Kind also 10 Minuten lang jedes Paar Socken in ihrem Schrank anprobieren möchte - kein Problem! Und während sie ganz konzentriert übt, sich die verschiedenen Socken selbst anzuziehen, mache ich schon mal Kaffee oder andere Dinge auf meiner meilenlangen To-Do-Liste und komme zurück, wenn das Kind fertig ist, um mit ihr das restliche Outfit zu wählen. Ich genieße es sehr, dass wir nicht hetzen müssen. So wird das Anziehen nie zu einem lästigen Punkt auf der Tagesordnung, der eben erledigt werden muss.
Kommunikation ist alles
Was die Wahl des Outfits für uns beide eigentlich zu so einem schönen Teil des Morgens macht, ist die Kommunikation! Wir kommunizieren die ganze Zeit miteinander, anders funktioniert das auch gar nicht. Ich gebe meistens die Richtung vor ("Als erstes brauchst du einen Body. Willst du dir einen aussuchen gehen?" .... "Den gestreiften? Okay, dann häng die anderen mal wieder zurück." ... "Brauchst du Hilfe beim Anziehen?" ... "So. Jetzt hast du einen Body an! Was brauchen wir als nächstes? ...."), aber ich greife nicht aktiv ein, solange sie keine Hilfe einfordert (beim Anziehen zum Beispiel). Wir reden dabei auch über das Wetter. Wir reden darüber, dass wir im Winter unter einem Romper oder einer kurzen Hose immer eine Strumpfhose anziehen. Und Kniestrümpfe am besten. Wir reden darüber, dass eine gewählte Kombination eventuell zu warm oder zu kalt sein könnte und wie wir das verbessern könnten. Suchen Alternativen. Und Kompromisse. Aber bei allem bestimme ich nicht. Ich informiere nur. Ich mache Vorschläge. Ich navigiere. Ich wähle aus, wenn sie kein Interesse zeigt. Aber das letzte Wort hat immer sie.Und wenn ihr gewähltes Outfit nur aus einem Body und Stulpen besteht, dann essen wir erst einmal Frühstück und reden vor dem Rausgehen noch mal darüber. Lautstarke Proteste oder totale Verweigerung gibt es nie. Warum auch? Sie weiß ja, dass das Anziehen bei uns kein Machtkampf ist.
Ellinors Woche in Outfits
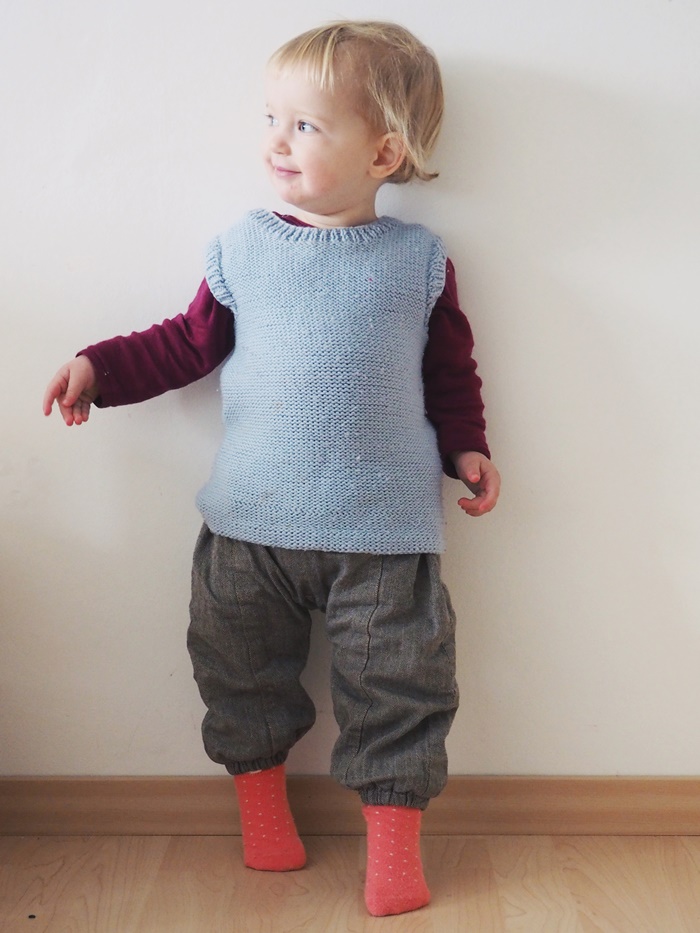
Am Schluss noch die Frage, die bestimmt viele von euch interessiert: Was für Outfits wählt sich mein Kind denn nun, wenn es ganz alleine aussuchen kann?Mir ist in den letzten Monaten aufgefallen, dass sie sehr wohl ihre Lieblingsteile hat, zu denen sie öfter greift, als zu anderen. Wie jeder Mensch, nehme ich an. Außerdem ist mir aufgefallen, dass sie ganz deutlich zu Kleidungsstücken aus Wolle - ob handgestrickt oder gekauft - tendiert. In den allermeisten Fällen wählt sie Wolle, wenn Wolle da ist. Ich habe ihr nie gesagt, welche ihrer Bodys aus Wolle und welche aus Baumwolle sind, zum Beispiel, also nehme ich an, dass es das angenehme Trageklima und/oder der Tragekomfort ist, der sie zu den Wollprodukten greifen lässt. Für mich ist es natürlich auch das schönste Kompliment, dass sie die Sachen, die ich ihr stricke, so liebt und so oft tagen will.
In der letzten Woche habe ich jeden Tag ein Foto vom Kind gemacht, um ihre gewählten Outfits festzuhalten.
Und los geht's! Ellinors Woche in Outfits:
Montag

Dienstag

Mittwoch

Donnerstag

Freitag
Samstag

Sonntag


